
Upgrading NXFilter on Raspberry Pi
If you have followed my previous post on how to install NXFilter on Raspberry Pi, you might find the following information useful to upgrade what you have installed.
Due to the ever changing world that we lived in, the software will have constant update. This post will make the update process less daunting. So when you have been prompted that there are new release of the NXFilter, you might want to start planning for the upgrade to what you have installed.
Step 1. Make a backup of the configuration
If you have spent hours to configure your nxfilter, you might want to backup your configuration. For this purpose login to your nxfilter and go to Config->Backup as shown in the following picture:
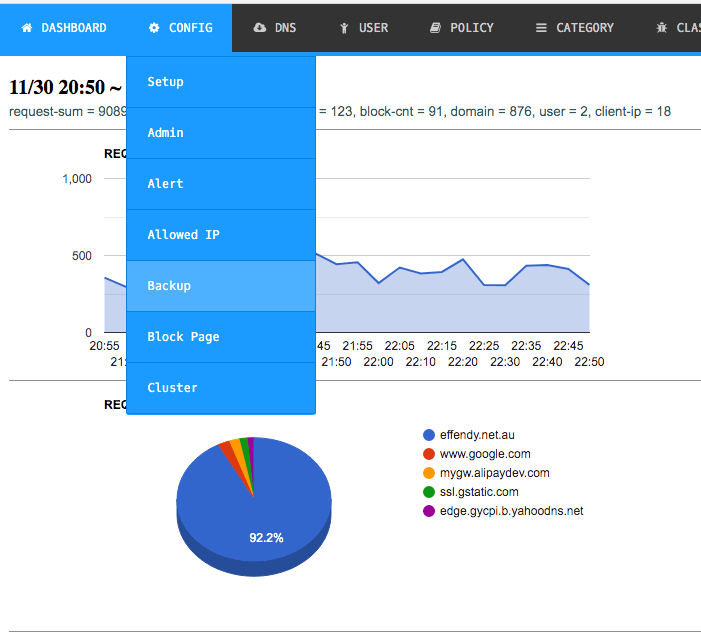
Then click on the “Create backup” button and save the configuration somewhere safe in your pc.
Step 2. Download the latest NxFilter zip file
Use the following script in the command line to download the latest version zip file of NxFilter. Head to the download location from the official website in the following link: https://nxfilter.org/p3/download/
Then right click on the latest zip file and use the wget command to download it in your Raspberry Pi
wget http://pub.nxfilter.org/nxfilter-4.5.1.5.zip
Step 3. Stop NxFilter
Run the following command to stop NxFilter, please note that devices that rely on NxFilter will not have access to internet, so you might want to plan this upgrade.
sudo systemctl stop nxfilterStep 4. Extract the zip file
Run the following command to extract the zip file to the folder where you have installed NxFilter. In my example, it was location at /nxfilter
sudo unzip nxfilter-4.5.1.5.zip -d /nxfilter
Answer “A” to overwrite all the files in the installation location.
Step 5. Change permission on all the scripts in the /nxfilter/bin location
Use the following command to give execute permission to all the scripts:
sudo chmod +x *.sh
Step 6. Start the NxFilter
Once all files have been extracted, you can now start NxFilter again using the following command:
sudo systemctl start nxfilterAnd you can monitor the progress using the following command:
tail -f /nxfilter/log/nxfilter.logIt will take a while for it to start up the configuration, just be patient, and you will see the following scrolling messages:

That’s it, to exit from the tail command you can press Ctrl + Z. Congratulations if you made it so far, which means that you have successfully upgraded your NxFilter installation. Please let me know if you encountered any issue. Feel free to share this post if you find it useful so that everyone can benefit from it.
Just updated to version 4.5.1.5
Just updated to version 4.5.4.2 using the following command
wget http://pub.nxfilter.org/nxfilter-4.5.4.2.zip
Just updated to version 4.6.2.2 using the following commmand
wget http://pub.nxfilter.org/nxfilter-4.6.2.2.zip