IoT Motion Sensor with light
This is the extension of the earlier post IoT Temperature Sensor with ESP8266. The extension is to additional IoT Motion Sensor with light.
Here are the concept picture.

We are going to connect the PIR sensor (motion sensor) to the other free port of the ESP8266. The PIR sensor consist of 3 legs, shown in the following picture:
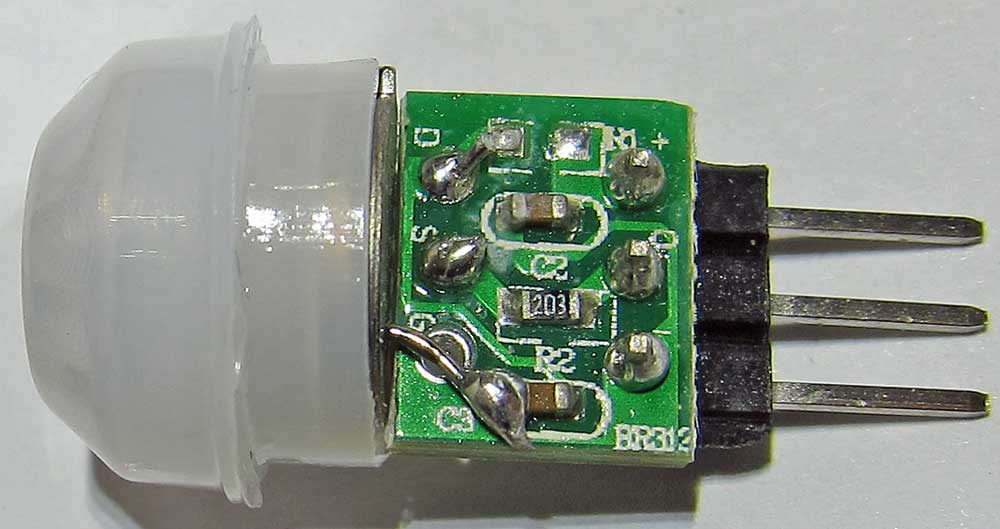
As you can see, there are tiny marking of +,0,- on the PCB next to the legs. So connect the “+” to 3.3V, “-” to the ground and the middle pin “0” to pin D6 of ESP8266.
To detect the motion we added the following code to our Arduino program:
void handlePIR(){
  DebugLn("handlePIR");
  motion = digitalRead(PIRpin) == HIGH;
  if (motion){
    digitalWrite(LED_BUILTIN, LOW);
    if (locklow){
      // make sure we wait for a transition to LOW before any further output
      locklow = false;
      Serial.print("motion detected at ");
      Serial.print(millis()/1000);
      Serial.println(" sec");
      delay(50);
    }
    takeLowTime = true;
 } else {
   digitalWrite(LED_BUILTIN, HIGH);
   if (takeLowTime){
     lowIn = millis(); // save the time of the transition from high to LOW
     takeLowTime = false; // make sure this is only done at the start of LOW phase
   }
   // if the sensor is low for more than the given pause, assume no more motion is going to happen
   if (!locklow && millis() - lowIn > pause){
   // make sure this block is executed again after new motion sequence had been detected
     locklow = true;
     Serial.print("motion ended at ");
     Serial.print((millis() - pause)/1000);
     Serial.print(" sec");
     delay(50);
   }
 }
 // post to webserver
 data = "pir_sensor=" + String(motion);
 postData(data);
}
The code above will light up the internal LED (Internal LED active LOW) when there is a motion being detected by the sensor.
In the next step we will connect the LED light to the circuit to allow us to control the light from the Internet.